
Related Articles


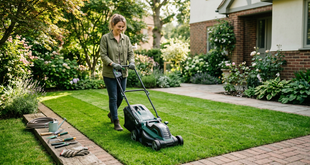
A small lawn can be both a blessing and a challenge. On the one side, you have less space to feed, water, and mow, which results in reduced expenses and less time spent on chores. However, all of the flaws are obvious. The entire yard can appear worn out by a few bare areas, a patch of yellow grass or some obstinate weeds. Fortunately, little lawns are also considerably simpler to maintain than huge ones. Even a total novice can transform a patchy garden into a cosy, green area with a little perseverance and the correct routines.
In simple terms, this guide guides you through the procedure. You don’t need years of gardening experience or pricey equipment. All you have to do is figure out what your grass needs and provide it those things on a regular basis. Let’s start with the fundamentals.
Recognise what you have first.
Take a leisurely stroll around your lawn and give it a thorough inspection before purchasing a single bag of seed or fertiliser. Take note of the areas with thick and thin grass. Keep an eye out for places that remain damp after rain, locations that are roasted by the afternoon sun, and areas that spend the most of the day in shade. You can learn a lot about the demands of your grass from these details.
Determining the sort of grass you have also helps. There are two major groups of grasses. Kentucky bluegrass, fescue, and ryegrass are examples of cool-season grasses that thrive in spring and fall and favour regions with chilly winters. Bermuda, zoysia, and St. Augustine are examples of warm-season grasses that flourish in the summer heat and become dormant when the temperature drops. Take a tiny sample of grass to a nearby garden center if you’re unsure which one you have. Knowing the type can help you make almost every decision going forward, including when to plant, feed, and mow. The majority of staff members can recognise it in a matter of seconds.
Lastly, consider how you use your yard. You need a hardy, quick-recovering grass if kids and pets play on it every day. You might concentrate more on look if it is primarily decorative. Your plan is shaped by your objectives.
Examine and Enhance Your Soil
One of the main causes of grass problems is that many novices neglect this procedure. The condition of the soil beneath the grass determines how healthy the grass can be. You can determine the pH level and the primary nutrients present with an inexpensive, basic home soil test kit. Inexpensive lab tests with more detailed results are also available at many local agricultural offices.
The majority of lawn grasses favour soil that is somewhat acidic rather than neutral, with a pH of 6.0 to 7.0. You may improve the acidity of your soil by applying garden lime. A small amount of sulphur can help lower it if it is overly alkaline. Here, don’t speculate. Testing beforehand is crucial because adding the incorrect product can exacerbate the situation.
Next, think about your soil’s texture. Although heavy clay retains water, it drains poorly and solidifies when dry. Although sandy soil drains quickly, it is poor at retaining nutrients. Applying a thin, quarter-inch-deep layer of compost to the lawn and gently raking it in can help both. Over time, compost enhances structure, adds organic matter, and nourishes beneficial soil life. This is an inexpensive and highly efficient improvement for a small lawn. Tired soil can be transformed into a fertile growing basis by doing this once or twice a year.
Remove Debris, Thatch, and Weeds
It’s time to tidy up once you understand your soil. First, clear away any items that have been sitting on the lawn, such as sticks and fallen leaves. A yellow patch might remain on a plastic toy even after a week.
The next objective is weeds. Hand pulling is practical and effective on a tiny lawn. Common offenders include clover, dandelions, and plantains. Use a weeding tool to remove the entire root after watering the soil the day before to make it softer. Many weeds will just grow back if you leave a portion of root behind. A selective lawn herbicide may be helpful for more serious weed issues, but always read the label and select one that is safe for the type of grass you have. Keep kids and dogs off the lawn for the prescribed amount of time, and never apply it on a windy day.
Another item to check is Thatch. A coating of dead grass roots and stems that accumulates between the earth and the green blades is called a thatch. It is natural and even beneficial to have a thin layer, no more than half an inch. Water, air, and nutrients cannot reach the roots due to a thick coating. Examine the brown, spongy layer by inserting a screwdriver into the turf. Use a strong lawn rake to remove it if it is more than half an inch thick. A manual rake is sufficient for a small yard, but if the accumulation is substantial, you can rent a dethatcher.
Use Overseeding to Fix Bare Patches
In a tiny lawn, bare and thin patches are likely the most obvious issue, and overseeding is the best remedy. Spreading fresh grass seed over the old turf to fill in the spaces and increase the lawn’s density is known as overeding. This procedure is beneficial in multiple ways, as a thicker lawn naturally suppresses weeds.
Time is of the essence. Early autumn is the best time of year for cool-season grasses since the soil is still warm, the air is colder, and rainfall is typically more consistent. The second best option is spring. Once the soil has warmed up appropriately, late spring and early summer are ideal for warm-season grasses.
Use a rake to remove the bare regions’ surface so the seed can come into contact with the soil for best results. Using the pace indicated on the box, evenly distribute the seed. Since overloaded seedlings compete and frequently fail, more is not always better. Once the seed has been scattered, gently press it into the ground by walking over it or using the back of a rake. Then, lightly cover it with a layer of straw or compost.
Next is the most crucial section. Depending on the type of grass, it may take one to three weeks for new seed to germinate if it is not continuously moist. Just enough water should be applied once or twice a day to keep the top inch of soil moist; do not allow it to dry out. You can gradually resume your regular watering regimen until the young grass is around three inches tall. A sun mix planted in deep shade will nearly always let you down, so pick a seed mix that is appropriate for your sun exposure.
Discover How to Mow Correctly
Mowing may appear easy, but even minor errors can cause subtle harm to a grass. Cutting the lawn too short is the most frequent. When grass gets scalped, its roots become weak and shallow and it loses the leaf surface required to produce nourishment. Additionally, shorter grass allows sunlight to penetrate the soil, promoting the growth of weed seeds.
Removing more than one-third of the blade height in a single mowing is a useful rule of thumb. Mow your lawn when it reaches about four and a half inches if it is supposed to remain at three inches. While several warm-season varieties favour a lower cut, the majority of cool-season grasses thrive at a height of three to four inches. Verify the advice for your particular type of grass and modify your mower deck as necessary.
Maintain the sharpness of your mower blade. Instead of cutting the grass smoothly, a dull blade rips it, creating ragged brown tips that appear dry and increase the lawn’s susceptibility to disease. It’s a quick and easy task to sharpen the blade once or twice a season.
Every time you mow, try to alter your pattern. The grass starts to tilt and the dirt along the tire pathways may become compacted if you mow in the same direction every time. The grass remains upright by alternating between diagonals, straight lines, and various directions. Think about leaving the clippings on the lawn as well. This technique, sometimes known as “grasscycling,” replenishes the soil with nutrients and may lessen the need for fertiliser. To prevent the clippings from clumping, just make sure the grass is dry before mowing.

Water Wisely, Not Frequently
Many novices make mistakes when it comes to watering, usually by overdoing it. Shallow roots are encouraged by frequent light watering, which weakens the grass in hot or dry conditions. In order to stimulate roots to develop deeper into the soil where moisture lasts longer, it is preferable to irrigate deeply and infrequently.
Generally speaking, most lawns require one inch of water per week, including rainfall. While you water the lawn, set a shallow container—such as a tuna can—on it to measure this. You’ve given the lawn what it needs when it fills to about an inch. This could entail two or three longer watering sessions per week instead of a daily mist, depending on your soil and weather.
Early in the morning, when the wind is quiet and the air is cold, is the ideal time to water. This reduces the chance of fungus since the grass dries during the day and the water can soak in before the sun evaporates it. Watering the grass in the evening might keep it damp overnight, which encourages disease. Your grass is most likely thirsty if you see your footprints remain evident after walking or if it turns a dismal grey green.
The Correct Way to Feed Your Lawn
Although it must be applied carefully, fertiliser provides grass with the nutrients it needs to grow thick and remain green. The three numbers on the bag of most fertilisers stand for nitrogen, phosphorus, and potassium. Potassium aids in the plant’s ability to withstand stress, phosphorus nourishes roots, and nitrogen propels lush green growth. In order to avoid wasting money on nutrients you already have, your soil test will reveal which minerals are truly lacking.
Two to four feedings per year are sufficient for the majority of tiny lawns. The best times to feed cool-season lawns are in the early and late autumn, with a small application in the spring being optional. The greatest times to feed warm-season lawns are in the late spring and summer, when they are actively growing. Because they feed the grass gradually and reduce the likelihood of burning it, slow release fertilisers are a great option for novices.
A handheld spreader helps you apply the product evenly and is generally sufficient because your grass is tiny. Burnt yellow streaks and dark green stripes are produced by uneven spreading. After applying fertiliser, always water the lawn softly to allow it to absorb. You should also clear any granules off roadways and sidewalks to prevent them from washing into drains. Compost, composted manure, and natural lawn feeds are examples of organic products that are both beneficial and enhance the soil.
Handle drainage, compaction, and shade.
Certain issues require extra care. One of the most prevalent is shade. The majority of lawn grasses require four to six hours of sunlight per day. Regular grass will struggle in areas of your yard that are next to tall fences or beneath trees. You can trim lower tree branches to let in more light, boost your mowing height in certain places, and select a seed mix that can withstand shadow, like fine fescue. It might be better to use mulch, ground cover plants, or a small seating area in extremely gloomy corners instead of grass.
Another hidden issue is compaction, particularly in yards where humans and pets frequently walk. Water and air cannot pass through compacted soil because it is so densely packed. Pushing a screwdriver into the ground is a straightforward test. Strong resistance indicates that the soil is most likely compacted. By removing tiny soil plugs, core aeration opens up pathways for nutrients, water, and oxygen. For a small lawn, you can use a manual aerator or rent a core one. Cool-season grasses thrive in the autumn, whereas warm-season varieties thrive in the early summer.
Long-lasting puddles are a sign of drainage issues. Compost and aeration can be helpful, but you might need to gradually cover low areas with a mixture of sand and dirt before reseeding. Because standing water causes moss, illness, and dead patches, these places should be repaired as soon as possible.
A Basic Annual Schedule
Maintaining a rhythm makes it easier to keep your lawn healthy. Clean away any trash, evaluate your soil, and start using mild weed control in the early spring. Start frequent mowing at the proper height as growth increases, and when there isn’t enough rain, water thoroughly. Maintain high mowing, water in the morning, and keep an eye out for pests or stress indicators in late spring and summer. For cool-season lawns, early autumn is the busiest and most productive time of year. Aeration, overseeding and feeding all produce great results. Continue pulling leaves in late autumn to prevent the grass from becoming suffocated, and if your type of grass need it, give it one last feeding. Avoid treading on frozen grass and let the lawn rest over the winter.
This process can be relatively straightforward if you put a few reminders on your phone calendar. The main goal of lawn care is to do little tasks at the appropriate times.
Typical Beginner Errors to Avoid
A few blunders recur despite the best of intentions. The first is cutting your lawn too short. The second is to water a bit each day rather than deeply. In an attempt to get quicker results, overfertilizer application frequently burns the grass and costs money. Disappointment results from planting seeds at the incorrect time of year or selecting a type of seed that is not compatible with your sunlight. No amount of seed or fertiliser can completely make up for bad soil, thus ignoring soil health is another expensive mistake.
Expecting results overnight is another error. Since grass is a live plant, changes can take weeks or even a whole season to manifest. Have patience, maintain consistency, and have faith in the process.
Concluding Remarks
It doesn’t take a large sum of money or expertise to improve a tiny lawn. All you need is focus, timing, and a readiness to pick up new skills along the way. Understanding your grass and soil is the first step. Next, get rid of weeds and thatch, overseed any exposed areas, mow at the right height, water well, and feed carefully. As unique problems like drainage, shading, and compaction arise, address them. Your lawn will repay you with thicker growth, richer colour, and a softer feel underfoot if you do these things gradually.
The best thing about having a tiny lawn is that you can see results very soon. You will soon have a green area that you are proud to unwind in, invite guests in, or just enjoy with your morning coffee if you take care of it every weekend. This week, start small and let your grass get better one season at a time.