Related Articles
Soon after they begin, many novice gardeners come to the unsettling realisation that their yard’s soil isn’t always suitable for plant growth. It could be packed with clay, full of stones, as hard as concrete, or so sandy that water evaporates as soon as you pour it. Some folks, like those who garden on a patio or in a new home development where the topsoil was scraped away during building, have no suitable land at all. Fortunately, you don’t have to put up with bad soil. Good garden soil can be made from scratch using minimal supplies and equipment.
In simple terms, this instruction describes how to create garden soil. You will discover the components of good soil, how to prepare a site, what to use, how to produce your own soil mix for raised beds and containers, and how to maintain the soil’s health over time. One of the most fulfilling aspects of gardening is making soil, so take your time and enjoy the process.
Recognise the Qualities of Good Garden Soil
Knowing what you are attempting to create is helpful before you begin mixing anything. There is more to good garden soil than just dirt. It is a live mixture of innumerable microscopic organisms, air, water, organic substances, and mineral particles. Sand, silt, and clay make up the mineral portion. Decomposed leaves, plants, and other natural elements make up the organic portion. When combined, they create a crumbly, black, sweet-smelling substance that drains effectively after rain and retains moisture without getting soggy.
Loam soil is good for gardening. It has a good amount of organic content and a well-balanced mixture of sand, silt, and clay. When you squeeze loam, it creates a loose ball that crumbles when you gently poke it. Loam feels soft and crumbly in your palm. Water passes through it steadily, roots can push through it with ease, and nutrients remain accessible to plants.
The same outcome is what you aim for when you make soil. A loose structure, enough moisture retention capacity, appropriate drainage, and a consistent supply of nutrients are all desirable. This guide’s steps all contribute to those objectives.
Select the Location of Your Soil Creation
The initial choice is the location of your new soil. There are three primary choices for beginners. You can plant in containers, construct raised beds with fresh soil, or enhance the current ground. Every option offers advantages of its own.
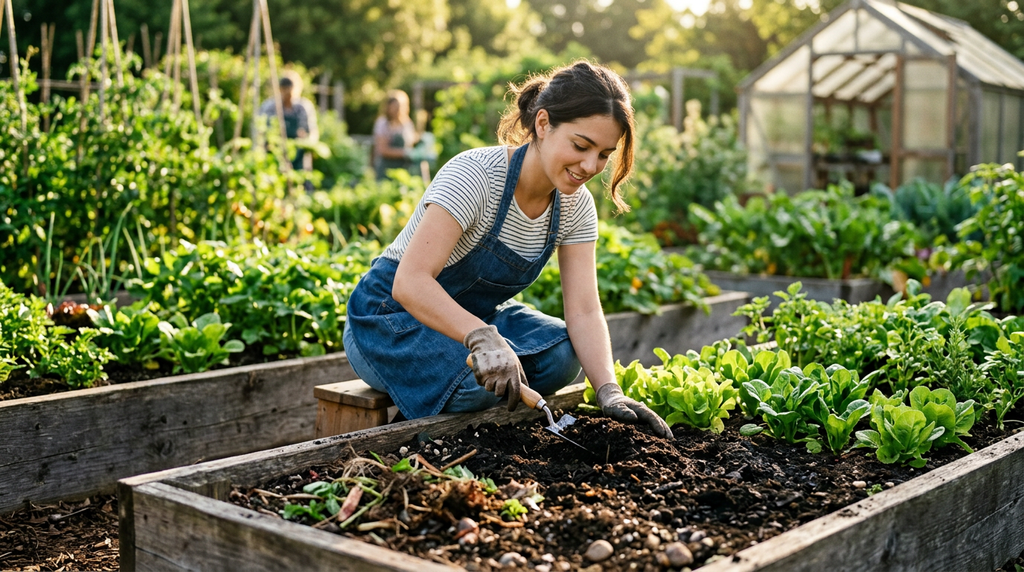
When the current soil is workable, improving the ground in place is the least expensive option. Because they give you total control, raised beds are ideal for novices. Drainage is typically superior, you can choose exactly what goes in, and you don’t walk on the planting area. Additionally, they work best in situations where the natural soil is particularly poor, polluted, or rocky. Containers are ideal for small places, patios, and balconies. They allow you to grow vegetables, flowers, and herbs in minimal space.
Whichever choice you select, if you want to grow vegetables, pick a location that gets at least six hours of sunlight each day. While some shade-loving plants are content with less exposure, most flowering plants like plenty of sun. You will be needing water frequently, particularly in the first season, so pick a spot with easy access to it.
Examine the Soil You Currently Have
Start with a basic test if you are working with the ground in your backyard. Examine the results of digging a tiny hole. Is the dirt loose and gritty, thick and sticky, or somewhere in between? Squeeze a handful of damp dirt. It is high in clay if it congeals into a compact, slick ball. It is sandy if it crumbles right away. You might already have good loam if it forms a loose ball that disintegrates readily.
The pH and main nutrient levels can be determined with a simple soil test kit from a garden center. A lot of local agricultural agencies also provide more detailed, low-cost lab examinations. A pH of 6.0 to 7.0 is ideal for the majority of flowers and vegetables. Garden lime can improve the pH of your soil if it is excessively acidic. Sulphur can reduce it if it is overly alkaline. The incorrect quantity can lead to issues, therefore don’t add these things carelessly. You save money and have a clear path when you test first.
If your property is old or was used for purposes other than housing, you should also look for contamination. Soil can accumulate lead from industrial processes or old paint. Use raised beds with imported soil if this is an issue, and before cultivating food, think about doing a lab test.
Get the Site Ready
Prepare the space once you understand what you are dealing with. Remove any undesired plants, rubbish, big roots, and rocks. If there is a lot of grass or weeds in the area, you can either smother them or remove them by hand using a spade. After moistening the ground with multiple layers of newspaper or flattened cardboard, cover it with a thick layer of mulch or compost. The covering kills the grass, restricts light, and decomposes into the soil over a few months. This method adds organic matter while being gentle and requiring little excavation.
If you would rather dig, use a garden fork to loosen the soil to a depth of eight to twelve inches. Remove stones and break up big clusters. Digging soggy dirt affects the earth’s structure and produces hard clods, therefore avoid working the soil while it is extremely wet. Squeezing a handful is a good rule of thumb. It’s ready to work if it crumbles readily. Wait a few more days if it turns into a muddy, sticky ball.
Include Compost as the Base
The most valuable component for making garden soil is compost. Decomposed organic resources including vegetable scraps, leaves, grass clippings, and garden trimmings are used to make it. It has a crumbly, black appearance and a lovely, fresh scent. All types of soil are improved by compost. It aids in retaining nutrients and water in sandy soil. It allows water and roots to pass through the structure of clay soil. It nourishes the microorganisms and earthworms that sustain life in all soils.
For an in-ground bed, cover the top eight inches of soil with a layer of compost that is two to three inches deep. You can add a little extra if your soil is extremely poor, but don’t add more than one-third of the compost by volume. Repeating this procedure annually for a fresh bed progressively creates rich, deep soil.
Garden centers and landscape vendors sell compost in bags or by the truckload. Look for a product that feels crumbly, has an earthy scent, and doesn’t contain big pieces of undecomposed material. It’s also easy to make your own. In a pile or bin, combine brown elements like shredded paper and dry leaves with green materials like kitchen leftovers and fresh grass clippings. Turn the mixture every several weeks and keep it moist. It turns into rich compost in a few of months. Steer clear of meat, dairy, greasy meals, and pet waste as these can harbour dangerous germs and draw bugs.
Make a Soil Mixture for Elevated Beds
You can create the ideal soil from the ground up if you’re building raised beds. Three components are combined in a dependable starter recipe. For drainage, combine roughly 60% high-quality topsoil, 30% compost, and 10% coarse material like perlite, coarse sand, or tiny pieces of bark. An equal mixture of topsoil, compost, and a third ingredient—such as aged manure or peat-free planting medium—is preferred by some gardeners. Depending on how the soil feels after mixing, you can change the precise ratio.
Before placing your material order, figure out how much you’ll need. To calculate cubic feet, multiply the bed’s length, width, and depth in feet. Bulk soil is typically sold in cubic yards, which may be calculated by dividing by 27. Because soil sinks after watering, order a bit more.
Using a shovel or garden fork, fill the bed in layers and thoroughly mix. To ensure that the soil settles properly, lightly water it as you go. Before planting, let it a few days to relax. This allows the mixture to settle and integrate, allowing you to determine whether it needs to be topped off.
Prepare Soil for Containers
Compared to garden beds, containers require a lighter mix. Heavy garden soil suffocates roots, packs down in pots, and prevents drainage. Alternatively, buy a container-specific potting mix or create your own by mixing equal parts compost, peat-free planting material (like coconut coir), and a drainage ingredient (like perlite or coarse sand). This mixture drains nicely, retains moisture, and remains fluffy.
Containers with bottom drainage holes should always be selected. Root rot is caused by water that cannot escape. Check the moisture frequently, especially in warmer weather, as pots dry out more quickly than the ground. Mulch on top aids in reducing evaporation. Add a handful of compost or a slow-release fertiliser to replenish the nutrients every season.
Utilise Additional Organic Materials
Although compost is the main ingredient, your soil can also be improved by other natural resources. Nutrients and organic matter are added by aged dung from cows, horses, chickens, or rabbits. The adjective “aged” is crucial. Before utilising fresh manure, let it rest for at least six months because it may contain dangerous bacteria and burn plants.
Leaf mould, which is created from decomposing leaves, enhances soil texture and moisture retention. It can be made by stacking fallen leaves in a corner and letting them sit there for a year or two. Wood chips, straw, and shredded bark work well as surface mulch and gradually decompose to replenish the soil.
Another helpful tool is cover crops. During the off-season, plants like clover, vetch, rye, and buckwheat can be cultivated in a bed before being chopped down and incorporated into the soil. They prevent erosion, loosen compacted soils, add organic matter, and, in the case of legumes, add nitrogen. They are an excellent, low-cost method of creating soil.
Maintain pH and nutrient balance
After your soil is well-structured, consider nourishment. Three primary nutrients are required in significant quantities by plants. Potassium promotes general strength and fruit quality, phosphorus promotes roots and flowers, and nitrogen promotes leafy growth. Additionally, they require less calcium, magnesium, and trace minerals.
Many of these nutrients are found in compost in a mild, well-balanced form. You can apply tailored organic fertilisers if your soil test reveals a particular deficiency. Phosphorus is supplied by bone meal, nitrogen is supplied by blood meal or alfalfa meal, and potassium and trace minerals are added by kelp meal. Because too much fertiliser can damage soil life and burn roots, pay close attention to the guidelines on the label.
Add lime or sulphur based on the test findings if your pH needs to be adjusted. Apply these compounds well before planting if at all possible, and retest after a few months because they act slowly.
Settle the New Soil with Water
Water your soil thoroughly once you’ve mixed and shaped it. As a result, the particles settle, big air pockets are eliminated, and the compost’s biological life is stimulated. Check the soil’s level after a few days. Add a bit more and water once more if it has sunk. The bed is ready when the surface is level and solid but not rigid.
Mulch the soil two to three inches deep before planting. Mulch inhibits weeds, retains moisture, shields the surface from intense rain, and nourishes the soil as it breaks down. To avoid decay, keep it slightly away from plant stems.
Maintain the Health of the Soil Over Time
Soil creation is just the first step. Maintaining its health is a continuous practice that is not challenging. Every spring or autumn, add a thin layer of compost. To ensure that the soil is never left bare, keep it covered with mulch or growing plants. Steer clear of planting areas since pressure compacts the soil. Vegetable crops should be rotated annually to avoid pest infestation and nutritional loss.
Roots grow downward when you water deeply and infrequently. Look for hints in your plants. Wilting despite moist soil can indicate inadequate drainage, while pale leaves may indicate a lack of nutrients. Because they indicate that the soil is alive and active, earthworms are a positive indicator.
Errors Novices Should Avoid
A few mistakes keep coming up. Dense, lifeless earth is frequently the result of using solely dirt from a bag without compost. When sand is added to clay without organic content, the mixture becomes hard and resembles concrete. Fresh manure can harm plants, and working damp soil destroys its structure. Overuse of fertiliser damages soil life, and neglecting a soil test results in speculation.
Impatience is the most frequent error. Over time, healthy soil grows, and it becomes better with each season of mulch and compost. Results will follow if you remain consistent.
Concluding Remarks
The foundation of any good garden is laid by the satisfying skill of creating garden soil. To begin, decide where to grow, test what you already have, and learn what constitutes healthy soil. Build mixtures that work with raised beds and containers, prepare the area, and add copious amounts of compost. Feed the soil with organic materials, carefully balance nutrients, and cover the top with mulch.
Stronger plants, larger harvests, and an easier-to-maintain garden are all possible with a little work today. This week, start with a single, easy step, like building a compost pile or applying a layer of compost to a tiny bed, and watch your garden soil come to life.