
Related Articles



Window boxes are a fantastic way to add charm, colour and greenery to your home. If you want to grow small herbs, lovely plants or fresh flowers, a window box can improve the look of your windows. But as time passes, weather, moisture or improper installation can lead to loose, damaged or unstable window boxes.
The good news is that you can often do that yourself, even if you’ve never fixed a window box before. With a few simple tools, the right supplies and a little perseverance, you can improve its stability and appearance without spending a lot of money.
In this beginner friendly tutorial, you will learn how to repair a window box, identify common problems, choose the right materials and how to maintain your window box.
Why You Should Repair a Window Box
The first and most important thing to do before any repairs is to determine what caused the problem. There are a few reasons why a window box might need repair.
away brackets: The brackets that hold the box may fall away because of weak fasteners, vibration, or wind.
Cracked wood: Repeated exposure to wetness and rain can cause wooden window boxes to rot or crack.
Poor drainage: Water collecting in the box can damage the material and the plant roots.
Rusty screws : Metal fasteners can rust over time, particularly in moist environments.
Unstable mounting: If a window box is not fitted securely it may shift away from the wall or lean forward.
Knowing the root cause allows you to choose the most suitable method of repair and ensures that the problem does not occur in the future.
Tools & Materials You’ll Need
Before you begin, gather your supplies so that the repair will go more easily and be better organised. Most window box repairs can be done with a few basic tools.
Here is a barebones list of useful resources:
Drill or screwdriver
A tape measure
Phase
or other suitable fasteners to replace screws
Heavy duty bracket mounting
Sand paper
Exterior grade wood filler if necessary
Exterior paint or wood sealer.
Proper drill bits for the mounting surface
Safety glasses and work gloves
Perhaps you don’t need everything on this list. The materials you choose will depend on what your window box is made of – wood, metal, plastic or some other material.
Step 1: Look Closely at the Window Box
First, look at the whole window box. Look for signs of water damage, rust, soft wood, cracks, loose screws and broken brackets.
Lightly poke the box to see if it moves when poked. A loose box can fall without warning so don’t put your hands under it or stand right behind it.
If the window box is already coming away from the wall, remove the plants and soil only if it is safe to do so. It may make the repair easier with lighter weight.
Verify how the brackets are attached to the wall or the window frame. Sometimes it’s not the box, it’s what’s holding the box that’s the problem.
Fix any rotting, broken, or shaky mounting areas and replace the box.
Step 2 Remove any damaged or loose parts
Once you find the problem, remove any loose screws, broken parts that need replacing, or broken brackets.
If there are rough spots on a wooden window box, you can smooth them off with sandpaper. If you notice small surface cracks, you can try exterior-grade wood filler to help restore the look.
Filler does not, however, replace the structural strength. If the wood is seriously rotten, disintegrating or split around a mounting point, it is usually safer to replace the damaged section or the whole box.
Inspect metal window boxes for rust and weakened seams. Badly corroded supports must be replaced, but minor surface rust can be cleaned off.
Small cracks in plastic boxes can sometimes be repaired using a substance made specifically for that type of plastic. Follow the manufacturer’s instructions.
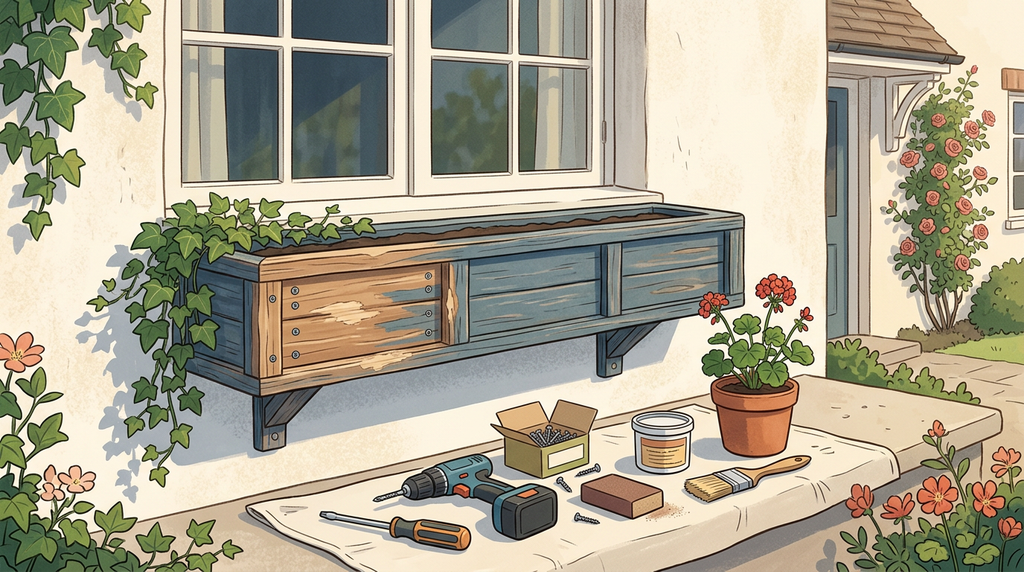
Step 3: Fasten the mounting brackets in place.
The importance of mounting brackets to the safety of your window box cannot be overemphasised. Choose brackets that can support the weight of the box, soil, plants and water.
Make sure the existing brackets are appropriate and intact. Replace weak brackets instead of using them for another repair.
Place the brackets as indicated by the window box manufacturer. Use a level to keep them straight.
Select fasteners appropriate for the mounting surface. Vinyl siding, wood, concrete and brick all require different installation techniques. Don’t assume that a normal screw will always hold firmly in all types of materials.
When mounting box on masonry use a proper masonry fastening system. When working with wood, use exterior-rated screws driven into sturdy structural material.
Look out for electrical wires, waterproofing layers, pipes and windows. If you don’t know where to drill, consult a trained professional.
Step 4: Reattach the window box securely
When the brackets are fixed or replaced, gently place the window box on its supports.
Ensure the box sits evenly and according to the manufacturer’s mounting instructions. Do not over-tighten the fasteners as they may damage the mounting surface or the box. Instead, pull them up tight.
Before adding soil or plants, double-check the installation. Securely fasten the brackets, ensuring that the box does not tilt or move.
Never try to test the box by putting your body under it or leaning against it. If it feels shaky, stop and correct any problems before mounting.
When your window boxes are very high up, it may be wise to go with professional installation.
Step 5: Protect the Material and Improve Drainage
It is important that both your window box and your plants have good drainage. Without drainage, excess water may accumulate in the container, causing material damage and root problems.
Check for drainage holes. If not, add drainage as per the manufacturer’s instructions, but do not weaken the construction or damage a waterproof liner.
Be sure to use an appropriate potting mix and don’t allow standing water in the container.
Select an exterior grade sealer or paint that is appropriate for wooden window boxes. Allow the coating to dry completely according to the manufacturer’s instructions before filling the box.
Plastic boxes may require materials designed for plastic surfaces only. Metal boxes may require a suitable rust-proof covering.
Mistakes Common Beginners Make
A few simple safety measures can go a long way in learning how to fix a window box.
Painting over rotten wood: Covering rotten wood with paint will not make it stronger.
Incorrect fasteners The incorrect fasteners can cause the mounting surface to become loose or damaged.
Box overload: Consider the total weight as wet dirt weighs a lot more than dry soil.
Neglect of drainage: The plants can be damaged and the life of the box shortened by poor drainage.
Neglecting routine inspections: Small problems left unaddressed can lead to expensive repairs.
Spending the time to choose the right materials and install the box right might get you a safer, more durable result.
Window Box Repair: How to Take Care of It Afterward
Once you’ve repaired your window box, a little routine maintenance will go a long way in keeping it secure and looking good.
Check the brackets and fasteners every few months or after a spell of heavy wind or rain. Check for signs of water damage, rust, flaking paint and new cracks.
Rake away dead leaves and plant debris. Ensure drainage openings are clear.
Look at the wooden boxes for soft spots or any swelling that occurs with the seasons. Reapply protective coatings as necessary in accordance with the manufacturer’s instructions.
And don’t fill the box with more plants, dirt or ornamental items than the box’s support system can hold securely.
Closing comments
It shouldn’t be difficult for beginners to fix a window box. Instead of replacing the entire structure, you often can fix up your window box by examining the damage, repairing any weak spots, securing the mounting brackets and improving drainage.
The most important thing is to put safety first and use materials that are appropriate for your window box and mounting surface. Never overlook structural damage, especially if the box is positioned over a door or walkway.
With proper installation and regular care, your window box can remain a beautiful addition to your home for many years to come. Start with a detailed inspection, go slow and enjoy improving your favourite flowers and plants.