
Related Articles

Great gardens begin below the surface, as every seasoned gardener will tell you. Your plants will suffer if the soil is poor, even if you get the most costly tools, the most beautiful flowers, and the greatest seeds. However, even novices may grow robust vegetables, vibrant flowers, and healthy shrubs with surprisingly little work when the soil is rich, loose, and full of life.
Words like pH, organic matter, or nutrient balance make a lot of novice gardeners anxious. Fortunately, improving soil is not difficult. It essentially boils down to knowing what you have, applying the proper materials, and gradually taking care of the ground. In order to improve your soil and have a flourishing garden year after year, this article breaks down each step into simple terms.
The Significance of Soil
Soil is more than just the earth that keeps plants upright. Minerals, water, air, decomposing plant matter, and billions of microscopic species including bacteria, fungi, and earthworms make up this living system. These organisms decompose organic materials and release nutrients that can be absorbed by plant roots. Additionally, they aid in the formation of microscopic air spaces that permit water to pass through the ground and roots to breathe.
Healthy soil retains enough moisture to keep plants hydrated without getting waterlogged. It provides consistent nutrients, drains efficiently after large rains, and is resistant to issues like illness and erosion. Plants may appear pale, develop slowly, wilt easily, or provide very little fruit when the soil is poor. Many issues that novices attribute to poor luck or pests actually have their roots in the soil.
Find Out What Kind of Soil You Have
Spend some time understanding where you are coming from before saying anything. The majority of garden soils can be classified as sandy, clay, or loamy. Everybody has advantages and disadvantages.
When you crush sandy soil, it crumbles and feels grainy. It has trouble retaining water and nutrients, yet it drains quickly and warms soon in the spring. When clay soil is moist, it feels sticky, and when it is dry, it feels hard. Although it can get compacted and drains slowly, it retains nutrients well, making it difficult for roots to spread. The perfect combination of sand, silt, and clay is loam. It has a crumbly texture, retains moisture without getting soggy, and is high in nutrients.
A basic squeeze test is something you can do at home. Squeeze a handful of damp earth into a ball. It’s probably sandy if it breaks apart immediately. It is most likely clay if it forms a sticky ball that feels smooth and maintains its shape. You are fortunate to get loam if it crumbles when prodded and forms a loose ball. The majority of gardens fall in the middle, and almost all of them have room for improvement.
The jar test is another simple check. Pour soil into a clear jar until it is about one-third full, then add water until it is almost full and give it a good shake. Watch the layers settle after a day of sitting. First to fall is sand, then silt, and finally clay. You can get a general notion of the composition of your soil by looking at the thickness of each layer.
Examine Your Soil
The uncertainty is eliminated with a soil test. While many local agricultural agencies and colleges offer more extensive laboratory tests for a modest fee, basic kits are available at garden centers and are reasonably priced. The pH level and the concentrations of important nutrients like potassium, phosphate, and nitrogen are shown by a proper test. Trace minerals and organic materials are also measured by some assays.
Seven is neutral on the pH scale, which ranges from extremely acidic to extremely alkaline. The majority of garden plants require soil that pH between 6.0 and 7.0, which is slightly acidic to neutral. Plants can absorb nutrients most easily at this range. Even if the nutrients are in the soil, plants cannot utilise them effectively if the pH is too far in either direction.
Garden lime can gradually improve the pH of your too acidic soil. Elemental sulphur or acidic organic compounds can lower it if it is overly alkaline. Apply these changes in accordance with the test instructions and retest after a few months because they work slowly. Don’t add products just because someone suggested them; the incorrect change can exacerbate the situation.
Before planting, in the early spring or autumn, is the ideal time to test. To ensure that the results of your test are representative of the entire garden, collect samples from several locations, combine them, and use that mixture.
Add the Gardener’s Best Friend: Compost
Compost is a hidden ingredient for improved soil. Decomposed organic materials including kitchen wastes, leaves, grass clippings, and plant trimmings make up compost. It smells earthy and nice and has the appearance of dark, crumbly soil. It instantly solves almost all soil issues in your garden.
Compost helps retain nutrients and water that would otherwise drain away from sandy soil. It breaks up the compacted particles in clay soil and makes room for roots and oxygen. It nourishes beneficial bacteria and earthworms in all types of soil, keeping the system functioning.
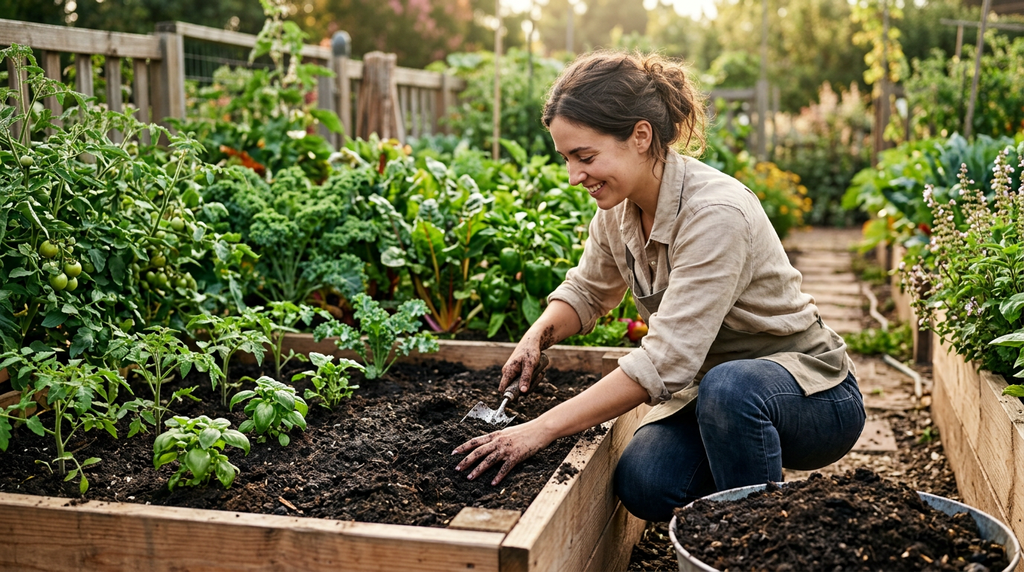
To use compost, cover the garden bed with a layer that is two to three inches thick, then use a garden fork to mix it into the top six to eight inches of soil. For well-established beds where excavating would upset the roots, just apply a layer of one inch to the top and allow rain and soil life to pull it down. Fertility is gradually increased by repeating this once or twice a year, in the spring and autumn.
Although you may purchase bagged compost, creating your own is simple and cost-effective. Layer green materials, like leftover vegetables and fresh grass clippings, with brown materials, like dry leaves, shredded paper and small twigs, in a mound or bin in a corner of the yard. Turn the pile every few weeks and keep it moist like a wrung-out sponge. Rich compost will be available for usage in a few months. Meat, dairy, greasy meals, and pet waste should not be added as they might draw pests and produce odours.
Utilise Organic Matter in Different Ways
Although compost is fantastic, there are other ways to nourish your soil. Nutrients and organic matter are added by aged dung from cows, horses, chickens, or rabbits. The adjective “aged” is crucial. Before applying fresh manure to the garden, let it rest for at least six months because it may contain dangerous bacteria and burn plants.
Another great amendment is leaf mould. It is created by stacking fallen leaves and let them to decompose for a year or two. If you have trees nearby, leaf mould is free and enhances soil texture and moisture retention. Untreated lawn grass clippings can also be placed to the compost pile or utilised as a thin mulch.
For novices with a little extra room, cover crops—also known as green manure—are a wise choice. These are plants like buckwheat, rye, clover, and vetch that you grow for soil improvement instead of harvest. They contribute organic matter and, in the case of legumes like clover, nitrogen when they are chopped down and incorporated into the soil. During the off-season, their roots also lessen erosion and soften compacted soil.
Mulch for Soil Protection and Nourishment
Mulch has numerous advantages and acts as a protective covering on top of the soil. It controls soil temperature, inhibits weed growth, keeps moisture from evaporating, and stops heavy rain from crusting the surface. Organic mulches also nourish the soil as they decompose.
Shredded bark, straw, wood chips, shredded leaves, and pine needles make good organic mulches. To avoid rot, spread a layer around plants that is two to four inches deep, keeping it slightly away from stems and trunks. Straw and shredded leaves are particularly useful in vegetable gardens. Once or twice a year, when the mulch starts to thin out, replace it.
Mulch can be compared to a blanket for your garden. When bare soil is exposed to the sun, wind, and rain, nutrients are washed away and the soil becomes dry. Soil that is covered remains moister, colder, and more vibrant.
Don’t Compact Your Soil
One of the most prevalent issues in home gardening is compacted soil. Tightly packed soil prevents roots from penetrating and causes water to flow off rather than soak in. Compaction can result from using heavy machinery, walking on garden beds, and cultivating the soil while it is too damp.
Make permanent walkways to avoid stepping on planting areas. Because you can get to the center without stepping on the ground, raised beds are an excellent option. Don’t start digging until the ground is somewhat damp but not saturated. Squeezing a handful of dirt is a straightforward test. It is too damp to work if it forms a muddy ball that does not disintegrate.
If your soil is already compacted, use a garden fork to gently loosen it by pushing the tines in and rolling them back and forth. Then, to keep the soil open, add compost. Additionally, a lot of gardeners employ a no-dig method in which compost is added to the soil on a seasonal basis and the soil is naturally mixed. This technique works well for novices who want less labour-intensive work and protects soil structure while reducing weeds.
Use Fertiliser Sensibly
Although fertiliser can promote plant growth, it is most effective when applied to soil that is already healthy. Three essential nutrients are required in significant quantities by plants: potassium for general strength and fruit quality, phosphorus for roots and flowers, and nitrogen for leafy growth. Which of these is low will be revealed by your soil test.
Bone meal, blood meal, fish emulsion, kelp meal, and lucerne meal are examples of organic fertilisers that promote soil life and release nutrients gradually. Although synthetic fertilisers work more quickly, over use of them might cause the soil to accumulate salts. Whichever type you select, pay close attention to the instructions on the label. Excess fertiliser can scorch roots, contaminate streams, and promote feeble, green growth; more is not always better.
For the majority of novices, a balanced approach is effective. Compost should be added to the soil initially; targeted fertiliser should only be added when a test or obvious plant symptoms indicate a requirement. Purplish leaves may indicate a lack of phosphorus, while yellow lower leaves frequently indicate insufficient nitrogen. Remember that similar symptoms might be caused by improper pH and inadequate watering, so examine those conditions before adding anything.
Use Water Correctly
The health of the soil is protected by good watering practices. While superficial daily sprinkling maintains roots close to the surface and weakens plants, deep, infrequent watering promotes roots to grow below. Including rainfall, most gardens require one inch of water each week, however clay soil may require slightly less and sandy soil may require slightly more.
When there is less evaporation in the early morning, water the base of the plants instead than the leaves. Because it provides water gradually where it’s needed, a drip hose, also known as a soaker hose, is an excellent tool for novices. As your soil gets better, you’ll find that you require less watering since healthy, organic-rich soil retains water like a sponge.
Keep the soil covered and rotate your crops.
If you cultivate vegetables, you can maintain soil balance by changing the locations of each crop family each year. Different plants draw different pests and absorb different nutrients. For instance, planting tomatoes in the same location each year can deplete some nutrients and promote the development of illnesses. The soil is kept in better condition by a straightforward three or four-year rotation of leafy crops, fruiting crops, root crops, and legumes.
Keeping the ground covered at all times is also beneficial. Instead of leaving the soil naked after harvesting, lay mulch or plant a cover crop. In addition to providing food for soil organisms, living roots and surface cover prevent soil erosion.
Have patience and pay attention.
The process of improving soil takes time. The initial season may yield greater results, but as organic matter accumulates and soil life increases over a number of years, the major improvements take place. To document everything you add, when you plant, and how things develop, keep a little journal. You will eventually notice trends and discover what your garden does best.
Keep an eye out for indications of improvement. Earthworms are an excellent indication since they demonstrate the health and vitality of the soil. Your efforts are paying off if the plants are dark in colour, have a crumbly texture, smell pleasant and earthy, and develop rapidly with less work.
Typical Beginner Errors to Avoid
In an attempt to loosen clay soil, many novice gardeners add sand, but this frequently results in a mixture that resembles concrete. A far better option is organic matter. Others add fertiliser or lime without testing, which might alter the equilibrium. When a rototiller is used excessively, beneficial organisms and the soil’s structure can be harmed. Other common mistakes include using fresh manure, leaving soil exposed, and watering too shallowly.
Expecting immediate results is the most common error of all. Healthy soil requires consistent attention and is constructed rather than purchased.
Concluding Remarks
One of the best investments a novice can make is to improve garden soil. Determine the sort of soil you have and test its nutrients and pH. Regularly add compost and other organic materials, mulch the surface to prevent compaction, fertilise carefully, and water thoroughly. Give the process time, rotate your crops, and keep the land covered.
Your plants will exhibit the changes as your soil gets richer, darker, and more vibrant with each passing season. The basis is the same whether you cultivate a simple patch of wildflowers, tomatoes, roses, or herbs. Your garden will be taken care of by the soil if you take care of it. Spread a layer of mulch or create a compost pile this week, and take pleasure in seeing your garden get stronger with each passing season.